Sunday, 1 June 2025

An Evacuation Binder Design Ideas

Swan on the Winnipeg River (photo by V.A. McMillan, 2025)


The GOOD Plan Blog

01 June 2025

An Evacuation Binder Design

The time has come to revisit important concepts when forced to evac your home due to threatening events like wildfires, floods, or after an earthquake or tornado. The concept of bugging out works well in a very finite scenario; however, there are more likely events that could force us away from home, and likely on short notice. These events will still retain some normalcy of law & order, thus we evac instead of bug-out. Being evacuated has become frequently too common.

Enough preamble. What can we do about it? Today, I want to share an organizational tool to fortify your G.O.O.D. Plan. Yes, you could buy what I am about to suggest, a something that is pre-made and pre-packaged. But, why?? The evacuation binder or evac binder, is a high priority piece of kit. My original concept for The G.O.O.D Plan – Get Out Of Dodge, was a binderedition that would provide a space to keep your G.O.O.D. Plan and supporting documents in one place. This is a very good idea and can be achieved with a standalone binder.

Where to start:

  • Ø  2” to 3” Zippered 3-ring binder (Purchase during back-to-school sales in August)
  • Ø  8-tab subject dividers
  • Ø  Business card holder pages for 3-ring binders
  • Ø  Portable digital storage device(s) – think USB drives, SD cards, External HD, SSD
  • Ø  Page protectors – letter size
  • Ø  Select hard copies of documents

First caveat is the binder needs to be made tough enough to get thrown in the back seat of your evac vehicle without exploding the contents all over the seat and floor. Thus, a fabric covered, zipper closing 3-ring binder. The size of the binder depends on how large your family is and how many hard-copy documents you decide to carry. 2” or 3” are common sizes and have a large carrying capacity.

2" Zippered Binder (photo by V.A. McMillan)


Binder design features to seek:

Ø  Full fabric coverage, with minimal openings for water, dust/sand, or snow to get inside.

Ø  Locking zipper pulls would be an advantage to keep the binder closed. A small luggage lock could be used or a small carabiner to keep the pulls together. This is not going to be an effective security method from thieves but might prevent and exploding binder at the most inopportune time.

Ø  Carrying handle on the binder spine and/or D-rings to attach a shoulder strap. Either make grabbing your evac binder during an evac easier.

Ø  External zippers file folder pocket. This will allow for a convenient location to collect and organize receipts, contracts, agreements, permits, or licenses during the evacuation. You will need these later for insurance claims or re-entry purposes after the evac.

Ø  External zippered pocket for miscellaneous items that need to be close at hand – keys to storage lockers, swipe cards for buildings, parking passes or toll road cards.

Ø  Inside the binder, locking rings for the 3-ring binder would be nice.

Ø  Interior zippered pocket(s) to hold digital storage devices. Padded would be nice. Space for spare USB cables/Lightning cables/External drive cables/CAT cable.

Ø  Velcro loop panels to attach item with Velcro hook tape.

If you search YouTube, you will find there are many ways or methods for organizing your Evac Binder. I will provide a simple method of organizing, and you are free to use it or decide to use a method that works better for you. The important part is to create an Evac Binder and have it ready to use, NOW.

There are four main subject areas, with some subdivision of those topics plus space for storing your FamilyEmergency Plan. Remember the three parts of a Family Emergency Plan include a S.I.P., G.O.O.D., and an I.N.C.H.

Evac Binder Subjects:

  • Ø  Personal
  • Ø  Financial
  • Ø  Medical
  • Ø  Legal

Personal includes:

  • Ø  Personal Identification – Birth Certificate, Passport, Driver’s License, Marriage License
  • Ø  Social Insurance Card, Medical Card, Student ID, Library Card, Auto Club Card
  • Ø  Education Proofs – Diplomas, Degrees, Trade Certificates, Red Seals, First Aid Tickets
  • Ø  Transcripts, Course Certificates, Letters of reference, Resume or Curriculum Vitae (CV)
  • Ø  Employment ID – Military ID, Business Access Card, Building ID Card

Financial includes:

  • Ø  Bank account details and bank/ATM card(s)
  • Ø  Credit card(s)
  • Ø  Insurance policies and insurance agent contact info
  • Ø  Investments and agent contact info
  • Ø  Household contents list (pics and videos room-by-room)
  • Ø  Loans, mortgages, and other debts
  • Ø  Receipts of high value items and serial numbers (Proof of ownership)
  • Ø  Inventory of precious metals – silver, gold, platinum (coin, bullion, wafers)

Medical includes:

  • Ø  Personal medical history, copy of your medical file, journal of medical visits
  • Ø  Family doctor contact info, medical specialist(s) contact info, Dentist contact info
  • Ø  Copies of X-rays, MRIs, CAT scans, etc.
  • Ø  Family medical history. What runs in the family? Heart disease? Cancer? Blood issues?

Legal includes:

  • Ø  Property deeds, rental agreements, registration certificates for vehicles, RVs, boats, toys
  • Ø  Last Will & Testament
  • Ø  Power of attorney, Living Will, other legal agreements/contracts
  • Ø  Contact info for your legal representative
  • Ø  Taxes – income taxes, property taxes, business taxes [Or can be part of Financial]

Family Emergency Plan includes:

  • Ø  Contact List (phone numbers, email addresses, and mailing addresses)
  • Ø  S.I.P. (Shelter-In-Place) Plan
  • Ø  G.O.O.D. (Get Out Of Dodge) Plan
  • Ø  I.N.C.H. (I’m Never Coming Home) Plan

Augmentations include:

  • Ø  Family photos, videos, and/or slideshows (keep a digital copy on a digital storage device)
  • Ø  Family History/Genealogy/Family Tree (if young children are the sole survivors this info is very valuable, first for finding living relatives and second when those kids grow up, they will know where they came from.)
  • Ø  Digital storage device(s) to hold digital copies of every document, picture, video, certificate, or any other item that can assist rebuilding life after a disaster.
  • Ø  Spare keys/access cards – home, vehicles, and/or storage – safety deposit box, storage unit
  • Ø  Password management – hard copy list of APPs, accounts, usernames & the associated passwords. Security questions and hints.
  • Ø  CASH at least $500 and work towards $2000 in cash in the Evac Binder. This is two-fold. One, it holds a supply of emergency cash to use during an evacuation. Second, this cash will help ensure your Evac Binder is properly protected before an emergency and will be remembered to be taken with you if/when you are ever evacuated. One suggestion online was to store the Evac Binder in a firearms safe…preferably, the safe near an exit.

Final thoughts…

Evac Binder Strategies

  • Ø  If you are following through to craft one binder…do yourself a favour and make a second copy that is stored at least five-hours driving time away from your current location or further away. Update once a year. This backup copy would only hold copies – digital and some hard copies of critical documents. This backup could be stored at a trusted friend or family member’s place or at a bank with safety deposit boxes.
  • Ø  Have a schedule for updating your primary (& secondary) Evac Binder contents. At least once a year. At least update the family photos on the digital storage devices. Alternately, update around the same time you rotate the items in your personal “Go Bag”
  • Ø  Print and laminate the prioritizedevacuation checklist. Keep the checklist near the exit point from your home…Velcroed inside a closet or back of a door.
  • Ø  Train your Evac Binder. Each person in your household should know where the Evac Binder is stored and should know what kind of information is saved inside. Train it! Review it! Update it! Practice it, again…and again. At least annually, until it is second nature. Test your passwords or personal contact list phone numbers or emails, at least once a year to ensure they are still valid.

Go Bag, Evac Binder, & The GOOD Plan (photo by V.A. McMillan, 2025)


This is just the primer. Now, it is up to you to accept this mission and build an Evac Binder for your family and your family’s survival during everyday crises or larger emergency or disaster events. Unlike other preparedness tasks like stockpiling a year’s worth of food, the tools to build a cabin in the woods, or an apocalypse vehicle; an Evac Binder…YOUR EVAC BINDER is something you can do. Right now! It will take time to collect, scan, copy, and compile the contents of your Evac Binder, but you can start today. You don’t even need a zippered binder at the start. If you have ever been evacuated, I know I do not have to speak any longer, you are on it!! For those who have never been evacuated, you will thank yourself for investing your time, now, to be ready for tomorrow.

Stay prepared!

VAM


Further reading:

Evacvs Bug-Out

Adapt.Improvise. Overcome. Survival Mindset.

EvacRoute Evaluation

RouteRecce


Friday, 4 April 2025

Evacuation vs Bugging Out - Comparing Similarities & Differences

Crossing the Tracks (photo by V.A. McMillan)

Evac vs Bugging Out
 

Here we are on the 4th of April 2025 and it is time for another discussion. Today's chat will be on the similarities and differences between evacuation and bugging out. Recently, I have been watching a lot of YouTube videos to get some new ideas for revising my personal evac or bug out kit list. Instead, I found myself dismayed by the chat content following these videos and the lively exchanges both supporting the creator of the video and critiques of the items suggested. Some of the most vocal were the followers of a bug out bag culture critiquing items or packing methods used for those following an evacuation preparedness culture. This has motivated me to enter into this realm of discussion to try to bridge the gap between these two preparedness cultures. BLUF (Bottom Line Up Front): This is not one side is right and the other side is wrong. This is an exploration of what the end game objective is and whether or not that objective is being achieved. If you prefer, we will explore the "why" the person is being prepared. Preparedness is a continuum which accounts for regular, lower impact events at one end and extreme impact rare events at the extreme other end of the continuum. Many who practice preparedness sit somewhere between the extremes. And, many also practice many levels of preparedness depending on the situation triggering an action to leave one's primary residence. So, let's get into this discussion, shall we...


I have generated a few slides to keep this chat on a tight line of thought.


First, maybe we should define what we are talking about. In the above slide I have captured what I believe are honest and accurate definitions of an evacuation and a bug out event. To the academics who may feel motivated to debate the finer linguistic points or errors, knock yourself out...post your critiques in the comments section at the end of this blog post. Suffice to say bugging out differs from an evacuation in the area of perceived threat from the authority having jurisdiction to proclaim a mandatory evacuation order. Thus, adding a secondary conflict to the primary event. Having personally evacuated from the 2013 Southern Alberta Flood event, and experienced having doors into and within my residence smashed in by the agents of the Crown, I fully appreciate and understand those who promote bugging out strategies and not just complying with evacuation orders.  

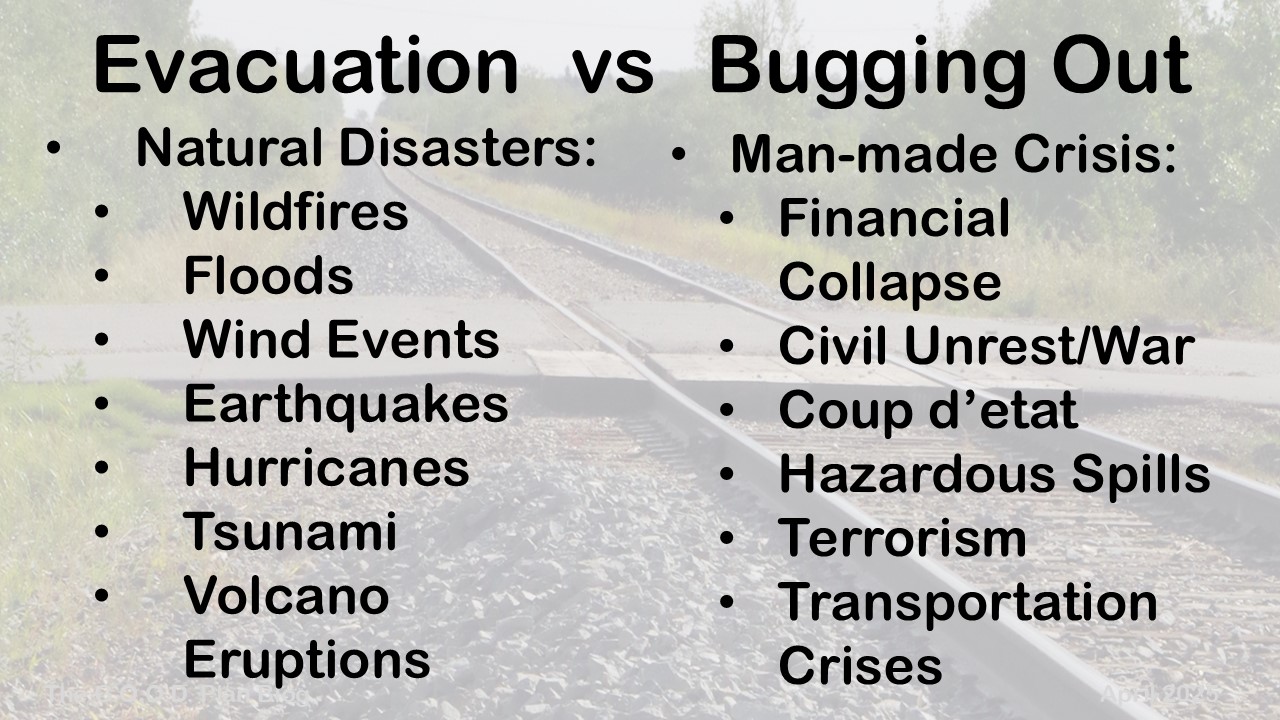
So, what types of events, both natural and man-made, could trigger an evacuation from one's primary residence??


This is not a complete list of events, but it is a good start for the purpose of this discussion. Not all events would trigger an evacuation response - blizzards, gas leaks, and many power outages would trigger a shelter-in-place response. So, the list above may or may not trigger a bug out response. 


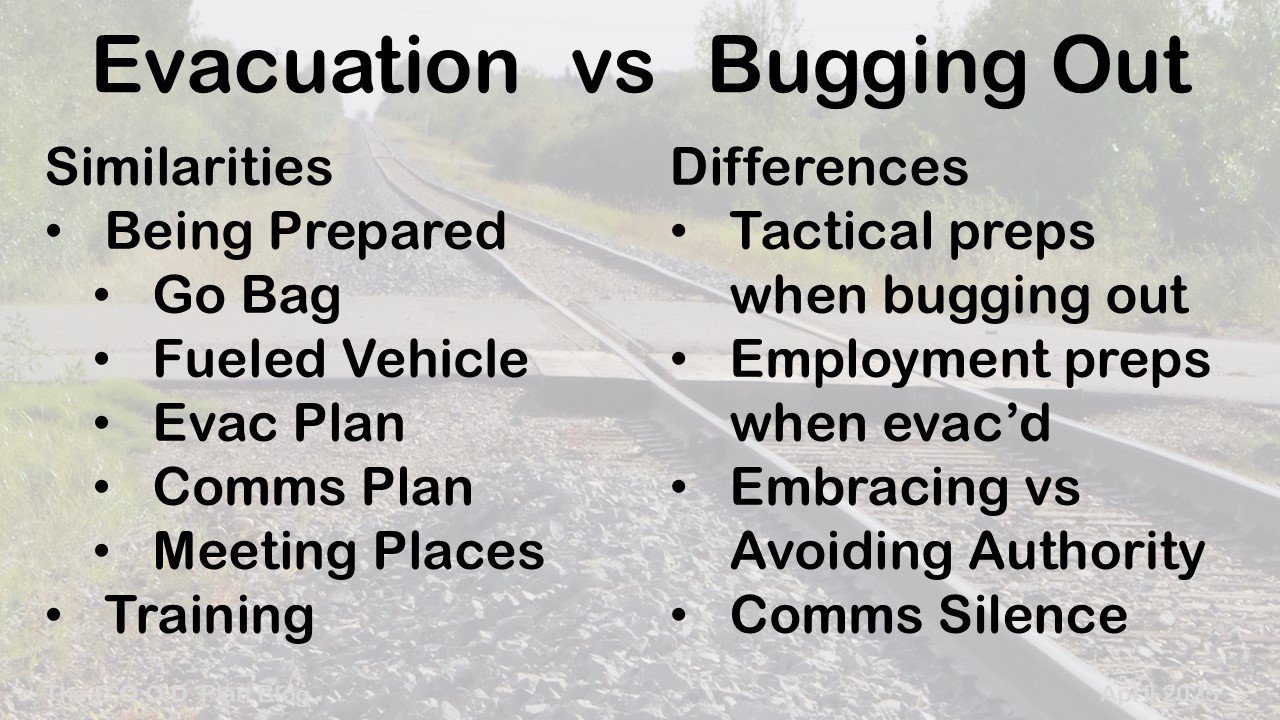
Now, being evacuation prepared and being ready to bug out is not mutually exclusive. In fact, both cultures follow similar practices on most items of preparedness. Starting with being prepared in the first place. Both practices support having a collection of critical items to be pre-packed and ready for a hasty departure from a location under threat to a safe location. Both groups support the idea of having a vehicle ready to aid in transport from an unsafe location to that safer location, this vehicle will be kept in good operating condition and will always have at least half a tank of fuel. Both groups support the idea of creating plans - evacuating/bugging out plan, a communications (comms) plan, a medical plan if folks get injured or sick, and contingency plans to back up primary plans. Furthermore, both groups support establishing meeting locations - near & far from the primary residence. Finally, both camps support training, albeit at differing levels. 

But, there are differences...the bug out culture expects at least minor breakdowns of normal law and order; and they prepare for those lawless places and times. These preparation include some level of self-defence from hostile forces. Secondly, because of these expected threats those bugging out travel and communicate at a tactical level and attempt to stay self-sufficient without aid from those in authority. On the other hand, those who are just evacuating from an event with the full expectation of returning "home" afterwards will also need to prepare to  continue to attend work, even while being displaced from "home". These differences contribute to differing kit lists and priority lists between these two groups. 


Speaking of kit, let's have a quick review of some categories that are shared and not shared between packing for an evacuation or bugging out. 

Both recommend having critical items pre-packed and ready for a rapid departure from the start point with little to no notice. Critical items could include personal forms of identification, deeds, insurance plan numbers, health care cards, pictures of the family, education documents, lists of serialized property, investment certificates, banking information, spare keys to vehicle(s), home, or storage units. 

Critical stuff can also include prescription medications, eye glasses/contact lenses, first aid kits, tourniquets, AEDs, over the counter (OTC) medicines, and stuff to stay clean. Beyond health care, are items for shelter (including clothing, footwear, hasty shelters), staying hydrated, and staying fed. Depending on the event, skills, training, resources, and expectations; these can be minimal in nature or a fully stocked RV unit.  

This extends to sleeping gear, navigation kit, and those basic tools used by pioneers to survive daily life a couple of centuries ago - think shovels, axes, saws, hammers, etc. These tools will reflect knowledge, experience, and available resources of the person evacuating.    

Last but not least are items to entertain self or others in protracted periods before getting back home. Whether this is a deck of cards or a bag of dice or a host of board games, the level of need will depend on the nature of those evacuated and the expected return. Children especially will need items to comfort and distract them. Plan accordingly. This goes doubly true for items that provide or preserve hope. Something to focus on to maintain your will to survive. The most dangerous times are when all hope is lost. It is in those moments when things can get very spicy. 

One of the big differences between those who are prepared to bug out vs those who "merely" evacuate, is the consideration for having to abandon the evacuation vehicle in favour of traveling by alternate means or even on foot. Sometimes those who are psychologically prepared to go on foot, fail to extend consideration to those evacuating via vehicle, that they might also be capable of transitioning from motorized movement to self-propelled. It just might take them longer to cross-load out on the road. And, yes, there is the possibility that they will encourage challenges that rob them of their vital gear during that transition. 


Well, I hope that starts beneficial discussions between you and those you care for or who look up to you to have the answers. Regardless of what motivates us to be prepared, we should focus on helping each other become better prepared than wasting energy on denouncing those who are not as prepared as you are. In these days with so many sources of conflict, those who choose to be prepared, should work together to help each other. 

Stay Frosty, folks!!

V.A.M.


Saturday, 18 January 2025

If I Were To Rebuild After A Wildfire - Design Considerations

Wildfire Smoke Sunset (photo by V.A. McMillan)

18 January 2025

Title: If I Were to Rebuild After a Wildfire


Never let a crisis go to waste – Socialist Saul Alinsky. Governments follow a similar mantra. So, with California once again being ravaged by wildfires and Canuckistan having had two really bad wildfire seasons (2023 & 2024), it is time to share some constructive suggestions for building better homes to weather wildfires. Nothing I am sharing is particularly novel. Four years in school (2019 – 2022) and reviewing tons of documents, articles, publications, textbooks, and reports; all to learn that the answers to creating fireproof homes has been around for decades. And more importantly your government and your insurance company both know this information. So why don’t you???? That is a curious question. FEMA, IBHS, ICLR and the numerous wildfire research facilities in North America, have all done the research and written the reports to share how to fireproof your home. Yet, homes continue to be made with materials and using designs that do NOT protect you or your home from wildfires! So, in the following blog post, I will endeavour to share as many practical ideas as possible. If you need to know my source material, here are some links to my past blog posts sharing my school research which have appropriate references:

Capstone: https://mtnmanblog.blogspot.com/2023/11/capstone-research-project-houses-of.html

Research Proposal: https://mtnmanblog.blogspot.com/2023/10/the-research-proposal-for-houses-of.html

Lit Review: https://mtnmanblog.blogspot.com/2023/09/houses-of-straw-sticks-bricks.html

Lit Review: https://mtnmanblog.blogspot.com/2023/08/beyond-three-little-pigs-creating_29.html

Bridging Gap: https://thegoodplanblog.blogspot.com/2023/12/bridging-gap-connecting-resilient.html

In keeping with my research (LINK), I would want the following features if I was rebuilding my home after a wildfire:

  • ·     Steep pitch roof (a minimum of a 4/12 pitch, with a 6/12 or 8/12 pitch being worth considering for shedding embers and fire brands) covered with metal roofing. If wind is also a consideration in addition to wildfire, ensure the roof is a hip roof design and not a gable roof or a complex roof design, to shed the wind.
  • ·    Augment windows (double or triple pane units) with fire shutters or storm shutters. Roll-down metal shutters would also be an option.
  • ·     Storm doors would also be worth adding over entrances that are not protected with roll-down shutters or other styles of storm/fire shutters.
  • ·   Consider upgrading to 2”x8” stick construction from the standard 2”x6” wall construction currently used in the housing industry. A 2”x8” wall construction would allow roll-down shutters for doors and windows to be built with a near flush finish with the exterior wall covering. A 2”x8” wall would hold more insultation providing improved thermal efficiency whether to preventing heating or cooling, depending on the weather conditions.
  • ·    Insulate with Rock Wool mineral-based insulation, which is fireproof would be my first choice.
  • ·    Fire rated (FR) Gyproc interior boarding would go without saying. The exterior would be finished with a cement-fibre board like Hardie Shingle board or other Hardie Board products. Any exposed beams would be covered with Hardie Plank.
  • ·     All vents or exhaust opening would be covered with fine wire mesh covers – no larger than 1/8” spacing between wires. ¼” wire spacing is too large and allows fine embers and small fire brands to enter, which could defeat other fireproofing techniques.

2"x8" Wall Features

Since I conducted my research for school, I have continued to pay attention to the issues for homes in the Wildland Urban Interface (WUI). But these solutions for those in the WUI also make good sense for any home constructed in an urban environment if you prefer to reduce your risk to fire hazards taking your home away. So, let’s list a few more things to consider:

  • ·   Make your home and your property as defendable as possible from fire. Both FireSmart and Firewise provide many suggests that work. Start with fireproofing the area from 0’ to 5’ around your home. Once fireproofed, this space needs to be maintained and kept free from combustible fuels. This is referred to as Zone Zero, the space every homeowner has control over. Defend this space with your time and effort and you stand a higher chance that your home will be less impacted by fire if a fire occurs in close proximity.
  • ·     Roof mounted sprinkler systems offer another defence tool to protect your roof and home from embers and fire brands for establishing themselves. If the embers and fire brands cannot burn surface materials because they are wet, then a fire is much more difficult to get established. In drier climates having a ready source of water to supply the sprinkler system would be very helpful. Back this up with a gas or propane powered water pump in the event that grid power is out, and water lines are no longer pressured – i.e., you turn the tap and no water comes out…no pressure for the water system.
  • ·      Where your home comes in contact with the ground, the walls going up from this point want to be covered in a non-combustible surface – solid concrete foundation walls, stone foundation walls, or covered with cement parging, stucco, cement-fibre board, tile, cultured stone. It does not matter too much as long as it cannot burn. This wants to cover at least the first 6” to 12” above the ground. This is an area where embers and fire brands projected from the wildfire will accumulate. Again, if a fire cannot establish against the wall, fire is less likely to get inside your home.
  • ·    Working out from your home are Zones 1 thru 3 (5’ out to 100’ around your home). The more prevention efforts you put into these spaces the greater the chance fire will have less impact on your home. Also, the more defendable this space, the greater the chance the wildfire service will invest their time to defend your home. From the wildfire services’ perspective, why would they invest any time or risk the lives of their firefighters defending a property that is a powder keg ready to explode when the ember storm arrives??? If you take the time and make the effort to create a defendable space, it will also be a safe location for wildfire firefighters to protect themselves, too. Follow FireSmart and Firewise before it's fire season.
  • ·    Water feature as part of your landscaping is another method to ensure there is water on your property for fighting wildfires. You may even want to contact your local wildfire firefighters to get their input on your landscaping to ensure they can pump from your water source, if ever needed.
  • ·   Going back to Zone 3, the outer space of your property defence. Consider strategic forest management. Yes, the purest fire defence would be to log everything and leave no fuel for a wildfire to feed on…however, few people want to live on a concrete slab or gravel parking lot. Defend hardest closest to your home and change the fire behaviour as far from your home as possible. This can be achieved by removing deadwood laying on the forest floor and removing ladder fuels that go from the ground up the trunk of the trees. Also, delimb your trees for the first 6’ to 10’ above the ground. Spacing between trees also plays a role in fire behaviour. The closer trees are together the easier it is for a wildfire to move. There are many factors that play into making a recommended spacing – age, height, health, species, climate, and time since last forest fire. This could be an entire blog post on its own. Once delimbed for 10’ spacing could be 10’ to 12’ between tree trunks, but that might be too close in some instances. Another strategy is to replace conifer trees with deciduous species closer to your home, as they do not burn as easy during most seasons. Local area knowledge needs to be applied to any of these suggestions.

I hope this gives you some ideas, too! For more ideas do your own research on:

  • ·       FireSmart
  • ·       Firewise
  • ·       Institute for Catastrophic Loss Reduction (ICLR)
  • ·       Insurance Institute for Business & Home Safety (IBHS)
  • ·       Dr. Jack Cohen – US Forest Service / Wildfire Researcher

To plug my own book, The G.O.O.D. Plan – Get Out Of Dodge (available on Amazon), I wrote some suggestions for homeowners for defending their property from wildfire to prevent getting evacuated. Many have been repeated above.

Until next time…take the time to defend your home and property from wildfire!


Mountainman.