Situational Awareness For Everyone - Lesson Plan: SAFE Lvl One Part 2 of 5
This is part two of a five part series of lesson plans for the Situational Awareness For Everyone (S.A.F.E.) level one course I developed at SATAS Co. I believe those in the emergency preparedness community will find this very helpful. This course is designed to be meaningful to all citizens. You are free to review this material, you may even share this material - so long as links to the original material and credit are given to this author, me, V. Andrew McMillan of SATAS Co. www.SATAS4.me
Lesson Plan
Topic/Title: Thinking Beyond 72 Hours – An Exercise In Critical Thinking
Presenter/Instructor: V. Andrew McMillan
Lesson Length: 90 Minutes
Required Resources:
Supplies/Reference Materials
Demo Items
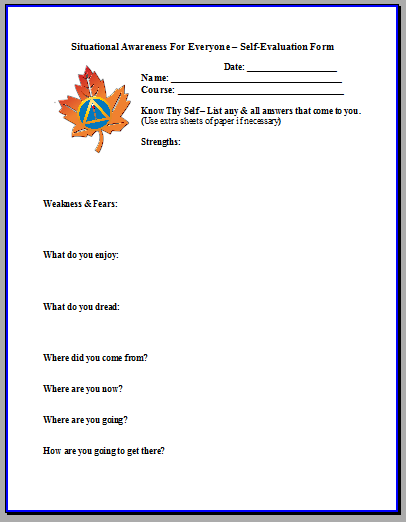
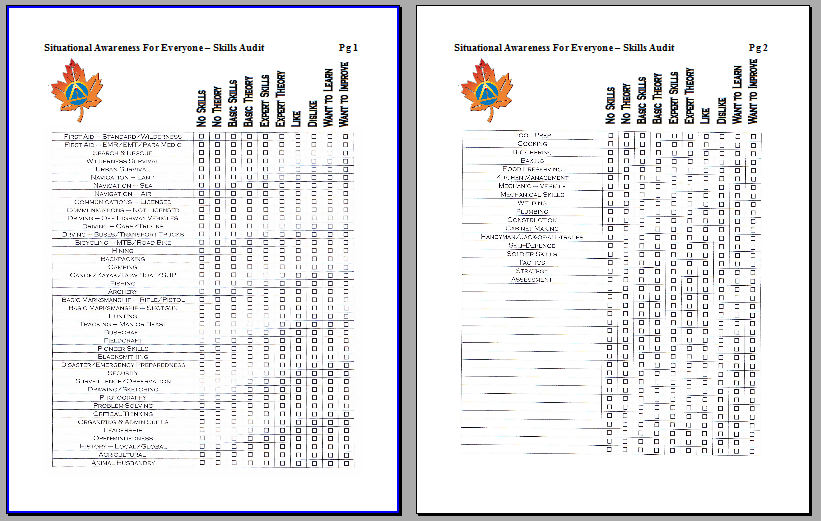
Handouts – Self-Evaluation Form & Skills Audit
Projector/Blackboard/Whiteboard
Pens, Pencils & Stationery (PP&S)
Supplies/Reference Materials
Demo Items
Handouts – Self-Evaluation Form & Skills Audit
Projector/Blackboard/Whiteboard
Pens, Pencils & Stationery (PP&S)
Introduction:
Welcome. This is our second lesson for SAFE One. I hope you enjoyed the previous lesson.
Before we engage with our new lesson I would like to define: Situational Awareness – (1) The art of knowing what is happening around you, recognizing threats/hazards, contriving a response plan & then putting your plan into action to minimize risk to your personal survival. (2) Is the sphere around a person which the person is aware of in the physical, emotional, spiritual, intellectual, meta-physical and/or psychological planes of existence. This is the BUBBLE, more specifically, this is your BUBBLE. Tactical Assessment – Is the critical thinking process when something enters your BUBBLE. Is it a THREAT?? Do you NEED to deal with it?? What SKILLS do you need to deal with it?? Do you HAVE those skills?? Did you ACT/REACT in the situation?? What did you LEARN?? What will you do next time??
I have found that using real world examples helps keep learning in focus and cross-trains our minds to look at everyday life from a new perspective. So, in this lesson I would like to take the 72 Hour Plan to the next level. The government has endorsed every citizen to be ready for at least the first 72 hours in any type of natural disaster or man-made emergency because if the event is too big or effects too many people, it may take days or weeks for first responders to reach all areas. The 72 hour kit, reduces the strain on the emergency response system, by allowing survivors to be self-sustaining for the first 3 days after the event. However, if the event is too large or covers too much area, 72 hours is not going to be enough. So, today, I want to explore preparing for the period after 72 hours. What to expect. Who to expect it from. What you can do to save your family and friends. Thinking Beyond 72 Hours – An Exercise In Critical Thinking.
Main Topic:
In the pamphlet, Your Emergency Preparedness Guide (ISBN: 978-0-662-45388-8) from Public Safety Canada; you are given the basics for a 72 Hour Kit. You are told to know your hazards, make a plan, make a kit and be ready to respond.
The pamphlet is a little thin on details and too limited on items to pack in your kit to be helpful to most citizens. Thus, most folks will not follow through, because if the government does not take this seriously, why should I?? That kind of thinking works well if you want, or expect, the government to hold your hand and take care of you during a disaster. Problem is, the level of care being offered is very primitive and privacy is not a consideration. You owe it to your family and yourself to strive for more. But to get more, you have to do some work before an emergency happens. That starts right now.
Your family needs an all risks emergency plan. You need to know what may happen in your specific area. You need to know how to prepare for those type of events. You need to have a plan for sheltering-in-place. You need to have an evacuation plan. You need a plan to gather your family together. You need a communications plan. You need a transportation plan. You need a shelter plan. You need a water plan. And, you need a “What if we can never return home plan?”
All of this is introduced in the 72 Hour pamphlet. So, I am assuming you have all done that planning already. You have, haven't you?
All of this is introduced in the 72 Hour pamphlet. So, I am assuming you have all done that planning already. You have, haven't you?
To move forward to the period of time after 72 hours we need to have our ducks in a row. Plans. Risk assessments. Kit(s) prepared and in place. We need to be mentally prepared.
Our extended plan must have provisions for:
Water – purification or transporting enough clean water to see you through 14 days. 30 days would be better.
Shelter – you need a weatherproof environment to rest, cook, eat and sleep.
Communication – you need to monitor the news/events and you need to be able to call out from wherever you are to let others know you are safe.
Transportation – you need to have the ability to move from unsafe locations to safe locations.
Nutrition – you need to consume enough healthy calories a day to stay fit and able to care for yourself. Two weeks is good, a month is better.
Warmth – in Canada you need to be able to stay warm without a fire. You need the best sleeping bag system you can afford. Bivy bag. Overbag. Sleeping Bag. Inner bag. Liner. Sleeping Pad.
Insulation/Clothing – you need enough clothes to protect you from the environment, as well as, a set of clothes for work – in case you are evacuated for an extended period of time but still have to show up at work to get paid.
Medical & Dental – you need to be able to care for minor medical and dental situations that may arise. First aid kit, first aid training and dental kits.
Fire – you need a fire kit. With enough supplies to start a fire in ANY weather condition.
Illumination – you want to be able to see or be seen at night. Solar or battery powered LED flashlights or headlamps would be a good first choice. Candles are a good back-up.
Repair Kit – you need the tools and the “know how” to do basic repairs.
Sanitation – you will need supplies to keep clean and contend with human waste disposal.
Protection – you may need to provide your own protection to your family from wild animals or desperate people.
We will proceed to explore each topic in greater depth.
Water:
Everybody in Canada needs at least 2 litre of drinking water a day PLUS another 2 litres for cooking and cleaning. No matter what causes the disaster, you need to stockpile or have the ability to collect and purify 4 litres of water per person per day.
Water weighs 1 kg per litre. A month's supply of water takes up 120 litres of space and weighs 120 kg's, per person. For a family of four that is 480 litres of space and 480 kg's of mass. Big and heavy. Without water you die. No sugar-coating this fact of survival. After oxygen to breath, water is the next most important item to individual survival. This is universal to all citizens of planet Earth. What does vary is the volume needed to keep you alive.
If you cannot store enough water; you need another strategy to make water clean enough to drink. The three main methods of cleaning water are:
1.Filter it
2.Treat it with chemicals, or
3.Boil it
2.Treat it with chemicals, or
3.Boil it
Once you have cleaned the water you need to store the clean water until it has been consumed.
Shelter:
Without shelter, you will be exposed to the elements. Even in the warmth of Summer, your survival time when totally exposed can be measured in hours, in the Winter only minutes.
So, shelter is also an important consideration for longer term survival after a disaster. If you do not take the time, effort and resources to prepare ahead of time you will severely limit your options after an event. Thankfully, after most disasters in Canada – either the government or the Red Cross will setup temporary housing for survivors. These shelters are not where you want to end up.
Longer term shelter options include:
Tents
Campers
RV Trailers
Cabins
Friends or Relatives Home's
Campers
RV Trailers
Cabins
Friends or Relatives Home's
Alternate shelters can be constructed from tarps and timbers, if you have the know-how and the tools. Knowledge, skills and experience are more important & valuable than shiny items in an expensive bug-out kit. Use your time now, to get the knowledge, skills and experience you need to survive after a disaster.
Communication:
Comms = Knowledge. This is a two way process. First you need information about what is happening around you and your family – before, during and after a disaster. Second, you need to tell loved ones that you are safe. Or, you are safe at the moment but need help to get to some place safer.
Also, communication is very helpful to get family members to a common location – a rally or rendezvous point, to facilitate linking up and bugging out together.
Your communications plan could have contingencies for linking up in the event of loss of comms. Your plan could include what channel to use on your CB or GMRS radio. Or whom to contact outside the effected disaster area to relay messages by cellphone or text messages.
If you had to evacuate, it may be necessary to leave messages or contact information at the Red Cross or Evacuation Centre, you may want to have a simple code for leaving plain language messages in public areas. These messages may indicate which direction or location you are headed for or how long you will wait for them to rendezvous at a given location.
To receive information, you want to own at least one portable AM/FM radio or AM/FM/SW radio. Grundig or Eton set the standard for good quality radios. Spare batteries or alternate power would be a wise idea – solar or wind-up. (Show examples to class.)
Transportation:
You need to be ready to move during any disaster. To this end, always keep you primary vehicle with not-less-than half a tank of fuel. If you have more than one vehicle, try to keep at least one vehicle full of fuel at all times.
Alternate transportation should be thought out – bicycles, motor bikes, ATV's, watercraft, over snow vehicles, aircraft, and always consider going out on foot.
Until, vehicle transportation is no longer a viable option, plan on moving by vehicle. Why?? Because you can carry more gear and supplies, not to mention you can cover greater distances and it is quick. If you have to evacuate, remember to bring an alternate method of transportation with you – bikes, ATV's or boats. As well as, good hiking shoes or boots in case you end up walking to safety. Carry a fuel resupply with you in jerry cans. This will double the time or distance you can travel without refueling at a gas station. Have cash on hand for fuel. Do not plan that ATM's or credit cards will be working nor accepted by merchants.
Nutrition:
Food is important, but not critical for the first few days. However, if you can be well fed for a week or two to get through the tough parts of a disaster, you can survive on reduced rations or without food for a few weeks. So, use your limited supply of food wisely, eat well until you have water, shelter, firewood, and sanitation systems in place. Then, sit tight and shelter-in-place. Using as few calories as necessary.
Food should be stored in an easily removable container – Rubbermaid Tub. Remember to use two or more tubs, so that the weakest person can lift the food tub into a vehicle. One heavy tub is not helpful, if the tub is left behind.
Inside the food tub, use smaller plastic or metal containers to further protect your food supply. Chose foods that need only heat or heat and water to prepare. Yes, this makes for a pretty plain diet, but a diet you can prepare on the run with minimal supplies. Explore the food options available to you now. What will your family eat?? Can you take those foods with you?? What options can you create to make meals more interesting??
Remember to have some type of drinking crystals or flavourings to add to your treated or filtered water. Tea bags or coffee are also worth their weight in a crisis.
Start small. Assemble enough food for 72 hours, then 7 days, then 14 day and try to get to a point of having 30 days of food ready to go in a plastic tub or two. Store these tubs near the point of exit from your home, so they will not be forgotten in the event of being evacuated.
Ensure each person has a mess kit – plate, bowl, mug/cup, knife, fork, spoon. Either in their personal bugout bag or in the food tubs. (Show examples to class.)
Warmth:
Warmth without fire. This means the best sleeping bag you can afford. You also need a sleeping pad to insulate you from the ground, a bivy bag to protect you from the air, and a sleeping bag liner to keep your sleeping bag clean on the inside. You may also want an inner sleeping bag to add extra warmth and/or an overbag to add warmth.
You may expect that a time or situation arises that requires you to be able to survive in just your sleeping bag gear without extra shelter and without a fire. If it is Winter, this will be a life or death situation.
The cheapest part of this system may be the sleeping pad. You can get away with a 3/8” thick 18” wide X 72” long closed cell foam pad that costs about $14 or you can spend $200+ on a down-filled inflatable sleeping mat. I would suggest spending most of the money on a quality down sleeping bag. If your environment is too damp for down, get the best synthetic fill you can afford. A quality Gore-tex bivy bag can be found at some online surplus stores like The Sportsman's Guide for less than $50 plus shipping. These are used bivy bags but in good condition. I would also suggest using a two bag system so you can double up sleeping bags in cold weather or single bag in warmer weather. (Show examples to class.)
Insulation/Clothing:
Some situations require us to be able to move or be on the move. To this end, we need clothing that can protect us from the elements and provide the ease of movement. Starting from the outer shell and working our way in:
Outer Layer (tops and bottoms):
Needs to be waterproof, windproof and is nice if it is able to breath. Gore-Tex stands out as good choice. A tight canvas and wool jacket may also work.
Needs to be waterproof, windproof and is nice if it is able to breath. Gore-Tex stands out as good choice. A tight canvas and wool jacket may also work.
Middle Layers (tops and bottoms):
This is the insulation layer(s). You need materials that can trap air to help insulate. This can be achieved with down, polar fleece, wool. If the activity level is expected to be low, the insulation level wants to be enough to stay warm without movement.
This is the insulation layer(s). You need materials that can trap air to help insulate. This can be achieved with down, polar fleece, wool. If the activity level is expected to be low, the insulation level wants to be enough to stay warm without movement.
On the otherhand, if you will be moving a lot, you only need a light insulation.
Inner Layers (tops and bottoms):
These are layers next-to-skin. Underwear and under shirts can be made of cotton. However, the long johns and long sleeve shirt should be polypro, micro-fleece, or silk. Cotton long johns hold too much water when used for prolonged periods of time.
Inner Layers (tops and bottoms):
These are layers next-to-skin. Underwear and under shirts can be made of cotton. However, the long johns and long sleeve shirt should be polypro, micro-fleece, or silk. Cotton long johns hold too much water when used for prolonged periods of time.
Head, Hands, Feet:
The head should be protected winter and summer. Brimmed hat for protection from the sun or rain. A toque and balaclava make good choices in the winter. Goggles help protect the eyes from wind, rain, snow and bright light.
The head should be protected winter and summer. Brimmed hat for protection from the sun or rain. A toque and balaclava make good choices in the winter. Goggles help protect the eyes from wind, rain, snow and bright light.
Hands want to be protected, too. Leather work gloves when doing any type of construction. Glove liners to prevent skin contact with cold items. Fleece or wool gloves over the liners with a leather or Gore-Tex mitt shell on the outside. Gloves promote dexterity, mitts preserve warmth.
Feet. Polypro liner socks next-to-skin, wool work socks over top, then a sturdy boot or mukluk if winter. In extreme cold you may want to have a third sock layer for added insulation, so long as it does not reduce circulation. Always have extra socks so at least one set can be worn, one set can be drying and a third dry set is always ready to be used.
Work clothes:
If you have evacuated from your home, but are still expected to go to your place of employment. Remember to have a set of proper work clothes packed in your evacuation bag. Keep it simple, but useful. You may have to wear the same outfit for a couple of weeks.
If you have evacuated from your home, but are still expected to go to your place of employment. Remember to have a set of proper work clothes packed in your evacuation bag. Keep it simple, but useful. You may have to wear the same outfit for a couple of weeks.
Work Footwear:
If possible, keep a practical, sturdy set of work shoes in your evacuation bag. You want to focus on durable and quality over fashion. You may have to evacuate from work, too.
If possible, keep a practical, sturdy set of work shoes in your evacuation bag. You want to focus on durable and quality over fashion. You may have to evacuate from work, too.
Final Note:
When preparing outer clothing for seasonal conditions, it is a very wise idea to pre-pack mitts, toques, balaclavas, scarves in the pockets of your jackets or parkas. And, while you are at it, it is also worth your time to pre-load a pocket with a length of paracord, Bic lighter and a whistle. These last items can be put in a ziploc bag. A compact LED flashlight or LED headlamp are also good additions. (Show examples to class.)
When preparing outer clothing for seasonal conditions, it is a very wise idea to pre-pack mitts, toques, balaclavas, scarves in the pockets of your jackets or parkas. And, while you are at it, it is also worth your time to pre-load a pocket with a length of paracord, Bic lighter and a whistle. These last items can be put in a ziploc bag. A compact LED flashlight or LED headlamp are also good additions. (Show examples to class.)
Medical & Dental:
Do not overlook your basic medical and dental needs. Have a first aid kit with plenty of supplies to treat minor wounds and day-to-day ailments. Over-the-counter medicines to treat upset stomach, diarrhea, nausea, headaches, fever and allergies, are always a good and safe choice. If you have young children, ensure children's medicines are included. Ensure you have taken a recognized first aid course, so you have the skills to use the tools.
Teeth. Tooth paste, tooth brush and dental floss, at the very minimum. Emergency tooth repair kit takes this to the next level. A broken tooth with no dentist can be a very painful ordeal to endure. Clove oil can help reduce pain of broken teeth or exposed nerves.
Do not forget to bring at least a month's supply of prescription medications. Talk with your doctor, you may be able to get an extra prescription for your bugout bag.
Fire:
And fire made it good! Yes, yes it did. With fire humans can endure almost anything. So, you need to be able to start a fire in any conditions, any place at anytime. You need fire making supplies and you need fire making skills. Skills need to be practiced, often.
Can you make a fire without a match, lighter or gallon of gasoline?? If not, now is the time to start learning other methods. Those other methods need to be practiced.
A basic fire kit includes:
At least 3 different fire starting methods – matches, lighters, fire steel
Tinder – petroleum jelly on cotton balls, candle stubs, dryer lint, “Zip” firestarter
Magnesium bar
Waterproof case
At least 3 different fire starting methods – matches, lighters, fire steel
Tinder – petroleum jelly on cotton balls, candle stubs, dryer lint, “Zip” firestarter
Magnesium bar
Waterproof case
Do not forget to consider a good knife, axe, saw & shovel for your vehicle. These tools will assist in making a fire. (Show examples to class.)
Illumination:
Humans do not like the dark, under normal conditions. Under extreme conditions like a disaster, being the dark brings all primal fears to foremost of our thoughts. To combat the fear, you need to illuminate the darkness.
I suggest at least 3 types of light:
1)Light without flame or battery – chemical light sticks
2)Battery powdered LED flashlight, headlight, or lantern
3)Flaming light – candles, lanterns, torches
1)Light without flame or battery – chemical light sticks
2)Battery powdered LED flashlight, headlight, or lantern
3)Flaming light – candles, lanterns, torches
For long term emergencies lights/lamps that have rechargeable batteries are a good idea. Recharge using solar power or built-in hand cranks prolong the units usefulness. Think long term when putting your kit together. Good quality items that will last, should be a primary consideration. (Show examples to class.)
Repair Kit:
If you have taken the time to get quality items for your evacuation kit, then protect you investment by ensuring you have the tools and supplies to make field repairs to your kit. Otherwise, items are just disposable, in that once it is broken or jammed you just throw it away because you cannot repair it.
This extends beyond just the items in your evacuation pack, it includes repair kits for your home, your vehicle(s) and even your tools for work.
If your portable shelter is a tent or tarp, ensure you can replace broken buckles, zippers or grommets. (Show examples to class.)
Sanitation:
If the power goes out, in all likelihood you will soon lose water delivery and septic removal. So, where are you going to go to the bathroom?? Large quantities of surface stored fecal matter will soon lead to the spread of disease. Will you just build a latrine in the flowerbed in front of your house?? Or maybe just empty your chamber pot off your 15 floor balcony??
To prevent getting or spreading disease you need to have a plan for dealing with urine and fecal matter. It will be a daily issue. The more people in one location the larger and more important this issue becomes.
Do you have a portable toilet unit?? Where do you empty it?? Can you make a composting toilet?? Do you have a supply of heavy-duty contractor garbage bags to contain the human waste?? Shovel to dig a latrine?? Lime powder to control bacterial growth in a latrine pit??
Solve this now, because you may be too busy later.
Protection:
As we have recently learned, during an emergency you need to protect your family, your home, your possessions from:
Fire
Water
Wind
Hail
Criminals
&
The Police/government
Fire
Water
Wind
Hail
Criminals
&
The Police/government
And the last group, is added with sadness. It is really too bad we can no longer trust our elected representatives or their agents to protect us or our possessions. But, the new fact-of-life is, we are on our own if we are forced from our homes. The best solution will be to work together with others from your family or community to make the best of a bad situation. Hopefully, in the near future this relationship between citizens and their government will improve for the better.
So, protect your home as best you can. But if you are forced to leave, pack heavy – take everything you can manage. Have the mindset that you may never return home again; and then pack accordingly. Secure your home as if professional burglars will be breaking-in in your absence.
Once on the road for the evacuation centre or other safe location have the means to protect your family and your vehicle full of “stuff” from bandits. Do not allow anything to block your route to safety. Travel in convoy fashion and maintain communication via CB radios, GMRS or even texting via cellphones – not the drivers, either the navigator or assign another family member to be the communications officer for you vehicle.
If you are a lawful firearms owner, take them with you. Have a secure, transportation case(s).
Be prepared to take care of yourself, your family and whatever items you were able to flee with. There will be times when others can help you, but don't count on it. Your survival is up to you.
Questions From Class (QFC):
Review:
In this lesson we have discussed planning for an emergency that has forced you to be evacuated from your home for more than 72 hours. We have considered thirteen areas of concern that should be planned for. (Water, shelter, communication, transportation, nutrition, warmth, insulation/clothing, medical & dental, fire, illumination, repair kit, sanitation and protection.) And we have explored, albeit briefly, the mind set of never returning home and packing heavy for evacuation.
In this lesson we have discussed planning for an emergency that has forced you to be evacuated from your home for more than 72 hours. We have considered thirteen areas of concern that should be planned for. (Water, shelter, communication, transportation, nutrition, warmth, insulation/clothing, medical & dental, fire, illumination, repair kit, sanitation and protection.) And we have explored, albeit briefly, the mind set of never returning home and packing heavy for evacuation.
Questions To Class (QTC):
Why prepare for more than 72 Hours?
What should you consider when planning for more than 72 hours? Name 3. Name 7. Name 13.
Will you return home after the evacuation? Why?
What should you consider when planning for more than 72 hours? Name 3. Name 7. Name 13.
Will you return home after the evacuation? Why?
Summation:
You have been an attentive class and I think many of you have shown a genuine interest in this topic. (You asked excellent questions.)
I think you have taken an important step in ensuring you & your family will be well taken care of in the event you ever have to survive a disaster. And I am confident that having been here today you will take the necessary steps to prepare for the future and be ready if and when the time comes.
To prepare for your next class I have two pieces of homework. The first is a self-evaluation form and the second is a skills assessment. These are tools to help you discover you. These will also help identify your strengths and areas that may require more development. Thus, you can focus energy on areas for your growth as a well rounded, aware person.
Thank you.
Your next lesson is with: ____________________________________________
Who will be discussing: ____________________________________________
At: ________ hrs, in the main lecture room. (or __________________________.)
Part three will follow in the next day or two. Thank you for reading. V.A.M.
No comments:
Post a Comment